Zum Inhalt der Seite gehen


I got this ~1950s mini sewing machine when someone was giving it away locally, so I've started restoring it. This is before...

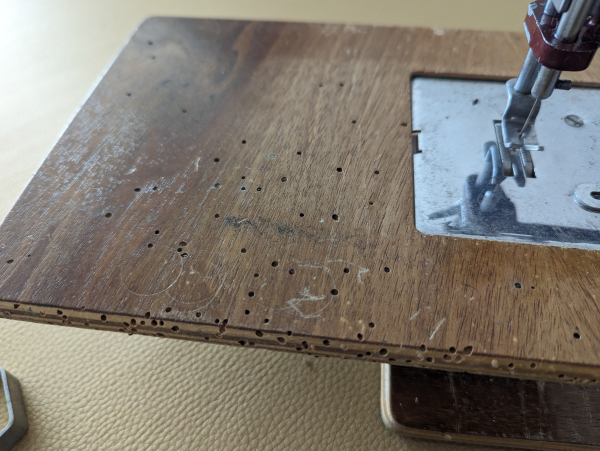
There was live woodworm eating into the wood panels, the paint was flaking off, and there were rust spots on the exposed metal. The mechanism was actually in decent working order though.

#sewing #restoration #repair #vintage
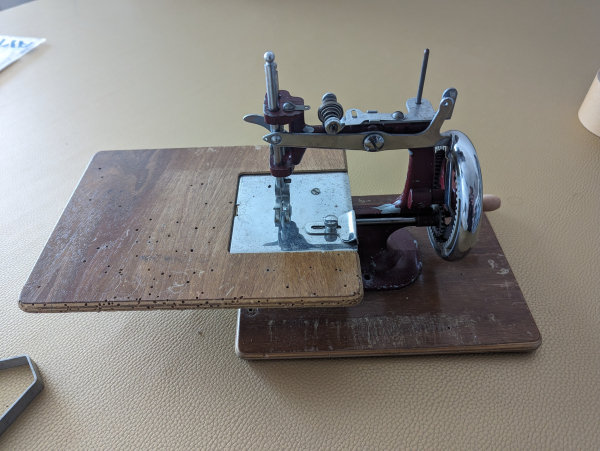
A miniature hand-crank sewing machine. The metal frame is covered with flaking burgundy paint, and the wooden table and base are marked with woodworm holes.
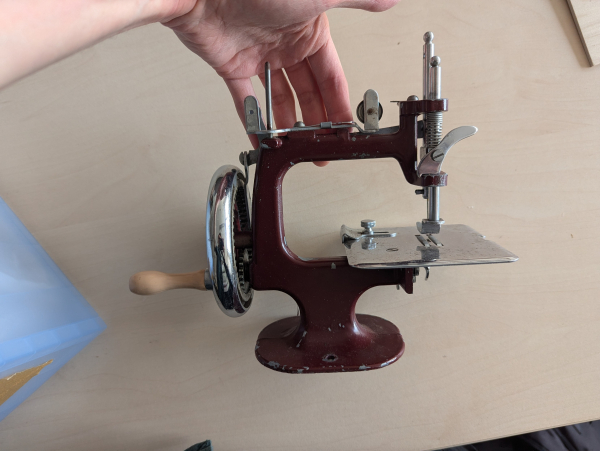
The machine with the base and table removed, showing flaking paint all over it.
Close-up of the wooden table panel, covered in woodworm holes and a few scratches in the varnish.
I started with the wood. For the base I just ordered a piece of plywood cut to the right size, because I don't have a table saw to easily cut down big panels.

For the table, I laser-cut layers of 2mm plywood in slightly different sizes to create the right profile in the sides of the slot. Here it is before and after sanding the edges to nice curves.
A rectangle of plywood with a square cutout on one side. If you look closely you can see that it's made of several layers of thin plywood, and one of the layers has a slightly larger cutout, creating a notch in the edge around it. The outer edges are straight and blackened from the laser cutter.
The same piece of wood, this time with the edges sanded down to smooth curves and the charring cleaned off.
Today I got started on the metalwork. First, dissassembling everything. It was scary but I took lots of pictures to keep track of how everything goes back together, so I can hopefully retrace my steps later.

The hardest part was removing the hand-crank wheel. It was really tightly wedged and I ended up having to hammer the metal in the centre of the wheel to release it. 😬

But it all came apart with no damage eventually.
The sewing machine from upthread, with a few screws and small parts removed and laying on the table in front.
The same machine with everything taken apart, and the hand crank wheel laying on the table next to it.
All the small parts from the machine scattered on a table.
Today I stripped off the flaking paint. Just many rounds of applying paint stripper, waiting, scrubbing, and repeating. Eventually got it all cleared off though.

Next will be cleaning all the other parts of rust, and then repainting. I won't be able to exactly match the old colour so I'm thinking I might do something totally different, but I haven't decided yet.
The body and hand-crank wheel of the machine coated in paint stripper, with the burgundy paint blistering and sloughing off.
The metal body and hand crank wheel, completely free of paint and showing only bare cast iron.
Dieser Beitrag wurde bearbeitet. (8 Monate her)
At the weekend I finished the wood parts with an oak-tinted, oil-based polyurethane gloss. I don't think I did a very good job applying it, but it seems pretty hard and shiny now so I'm satisfied.
Wider view of the varnished wood pieces.
Close view of the two pieces of wood from upthread, this time looking glossy and dark golden-brown.
It's been a while, but I'm back on the mini sewing machine restoration. I cleaned the rust from the metal parts (thankfully there wasn't much), and then prepared for painting. Masking tape on the large areas and sacrificial blutack to plug the screw holes.
Metal sewing machine body and wheel, with parts covered in brown masking tape, and blutack blobs over all the screw holes.
Closer view of some blutacked screw holes
I decided to go for this nice bright green, because I knew I couldn't match the original colour, and didn't like it much anyway. I don't know much about paint, but it was described as "universal PU enamel" suitable for metal and other materials, and came in a rattle can.

I've spent a week on spraying, sanding, and what felt like endless waiting in between layers.
Sewing machine parts arranged inside a large cardboard box standing on end, they've been sprayed bright green and the spray can is next to the box.
This morning I took off the masking tape and blutack from the main parts. The paint finish isn't perfect, but I'm pretty happy with it! Especially considering it's the second time I've ever used spray paint, the parts were very awkward shapes, and I was doing it all in freezing cold weather.

Now I just need to wait another week or so for the paint to finish curing fully, and then it will be time to find out if I can reassemble it...
The sewing machine parts, now glossy bright green, with the masking tape removed so there are clean bare metal areas visible again.
Another angle, the paint and metal are gleaming nicely in the sunlight
It's finished!

It's not perfect, but this was the first time I've ever done work like this and I'm really pleased with it.

@sewing

#sewing #restoration #repair #vintage #darkTimeToots
Two photos of the sewing machine, one before (flaking burgundy paint, rusty metal, woodwormy table and base), and one after (fresh green paint, shiny metal, new clean table and base).
The restored machine at a jaunty angle, with the extension table removed.
Low angle view of the machine, with the below-table hardware visible
Higher angle view of the machine with the table attached, and clamped onto the table ready to use.
Dieser Beitrag wurde bearbeitet. (2 Monate her)

Jenny Andrew hat dies geteilt